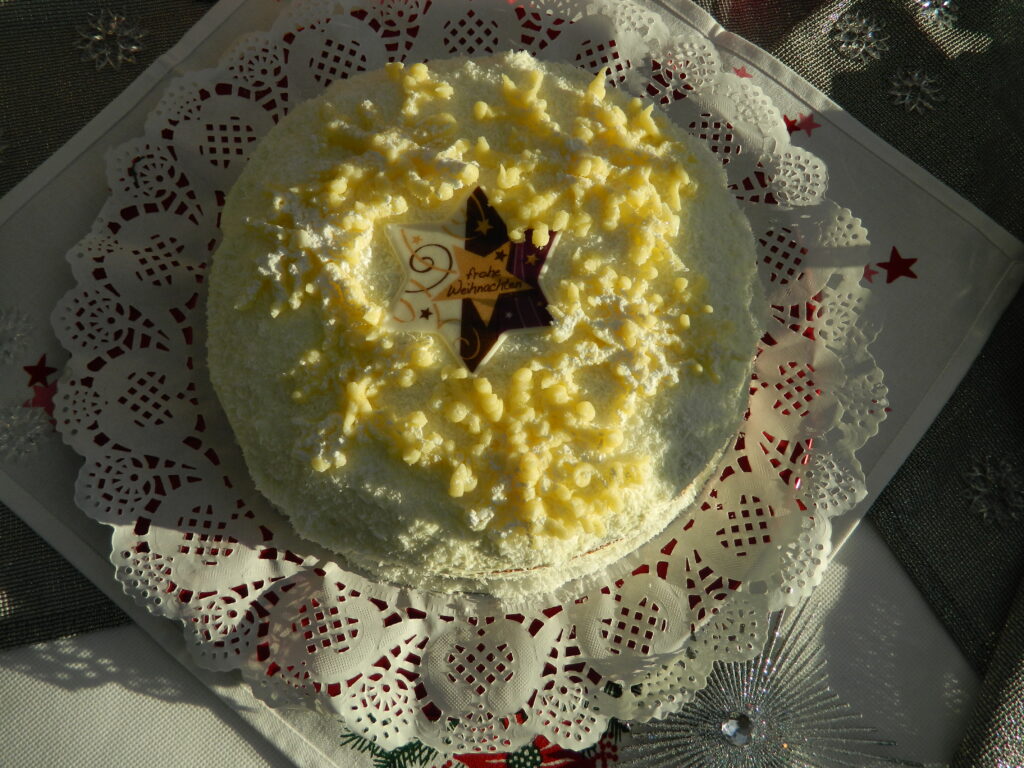
Firstly, I wanted to mention that this cake feels like one of my oldest recipes. However, I see that it has been added only in 2013. Wow, the time really flies. This Snowy Coconut Cake is a perfect treat for many festive occasions like Birthdays, New Year’s Celebration, Christmas or Thanksgiving.
The base of this scrumptious cake is a marzipan chocolate bar. The one I have in mind isn’t really easy to find worldwide. Therefore, you can make it from any favourable bars like bounty, snickers, marzipan bars or chocolate snack. No limits to imagination, just stick to the amount of 150g.
Snowy Coconut Cake is suitable for kids from the age of 3. There is nothing healthy about that, but it makes a moist and smooth dessert. Cut a thin slice to your little one and success is guaranteed.
I tried once a version with buttercream or Mascarpone Cheese but easy sweetened whipped cream is the correct filling. Depending on the chocolate bar The Sponge tends to be rather sweet, so lightly sweetened whipped cream is a great combination. Trust me on this one. Sprinkle with coconut flakes, decorate with marzipan or buttercream and have a joy with your beloved. A prosperous year to everyone!
Total Time: 2 hours
Shopping List
150g of favourable chocolate bars (even white chocolate)
1 teaspoon of ground cinnamon
2 whole eggs, separated
160g of icing sugar, sifted
3 tablespoons of olive oil
A splash of rum
200ml of lukewarm milk
240g of semi-coarse flour, sifted
2 teaspoons of baking powder without phosphorus
The Topping:
500g of good quality double cream
1 package of vanilla sugar
4 handfuls of coconut flakes
Decorate with marzipan figures or buttercream as per in my Lemon Buttercream Cupcakes Recipe:
60g of butter, softened
60g of icing sugar, sifted
1 teaspoon of vanilla extract
1 teaspoon of lemon zest and a splash of lemon juice
A splash of milk
Instructions
Preheat the oven to 180 degrees.
The Sponge
First, place the chocolate bars with cinnamon into a blender. Blend until you have a smooth crumby texture.
Second, in a large mixing bowl beat the egg yolks with icing sugar. Gradually add oil, rum and milk in 2 parts. Mix until it whitens and get foamy, for about 3 minutes on high speed.
Meanwhile whisk the egg whites in a medium metal bowl into firm peaks.
Sieve the flour with baking powder into the dough and give a last good stir.
Next, mold the snow with chocolate bar mixture into 2 parts. Mix with a spatula. Mold and turn over.
Once there are no lumps, pour the dough into a 24cm springform lined with a knob of butter and some flour. Beat against the table, so there is no air within.
Bake in the oven for about 40 minutes until it golden and baked through. Open the form and let it cool down entirely.
The Topping
In a small metal bowl whip the cream into firm peaks. Start on low speed and gradually add vanilla sugar.
Then, give it more speed. Once it starts thickening, lower the speed again and whip into perfection. Done. Refrigerate until processing.
If you decide to decorate with buttercream, follow my instructions:
Place softened butter in a small mixing bowl and whisk together with icing sugar.
Stir in the vanilla extract, lemon zest and juice. A splash of milk in and mix until incorporated well.
Mold it into a decoration bag and continue.
Presentation
Flip the cake out of the tin and cut it in half slowly with a sharp knife.
In case the cake has risen too much in the oven, cut the top and eat it, so you will have 2 really nice and flat bases to decorate.
The top half is now the bottom. Put a bit of whipped cream on the serving plate and place the top half as the base.
Next, ⅔ of whipped cream in the center and smoothen up to 1 cm from the edge of the cake.
Gently place the second half of the cake on top (the bottom sponge will be now the top) and cover with the rest of the whipped cream. You can make it really smooth like a semi-naked cake or thicker like a snow land. Smoothen the top and the sides and have fun with it.
Generously sprinkle with coconut flakes.
Now you can pipe some buttercream on top and sides if you like to. If you need some image, place a piece of baking sheet on top of your picture and pipe over the lines. Then, freeze until firm. Sprinkle with icing sugar and gently transfer onto a cake.
You can also pipe the figures directly onto a cake, that’s perhaps easier. I went for winter image of snowflakes. Refrigerate until serving or enjoy straight away, the fresher the better.
Makes 10 serves.
Share this:
- Click to share on Facebook (Opens in new window) Facebook
- Click to share on LinkedIn (Opens in new window) LinkedIn
- Click to share on X (Opens in new window) X
- Click to share on WhatsApp (Opens in new window) WhatsApp
- Click to share on Pinterest (Opens in new window) Pinterest
- Click to email a link to a friend (Opens in new window) Email

